Contents
- Intended audience
- Prerequisites
- Get the Magento software package
- Set file system ownership and permissions
Intended audience
The audience for this topic is anyone who downloaded a compressed Magento software archive (.zip or .tar). If you鈥檇 rather use Composer, go back and choose another starting point.
Prerequisites
Before you continue, make sure you鈥檝e done all of the following:
- Set up a server that meets our system requirements
- Created the Magento file system owner
Get the Magento software packages
The following table discusses where to get the Magento software. We provide the following downloads:
- Magento CE or EE software only
- Magento CE or EE software with sample data (designed to help you learn Magento faster)
These packages are easy to get and install. You don鈥檛 need to use Composer, all you need to do is to upload a package to your Magento server or hosted platform, unpack it, and run the web-based Setup Wizard.
Archives are available in the following formats: .zip, .tar.bz2, .tar.gz
| Magento edition | Install package location |
|---|---|
| Magento CE |
Choose either the software or the software and sample data:
|
| Magento EE | Use the following steps:
|
Transfer the Magento archive to your server
To transfer the Magento software archive to your server:
-
Install and configure a file transfer protocol (FTP) or secure copy protocol (SCP) client to transfer the Magento software from your computer to your server.
There are many ways to configure FTP and SCP. Following are a few packages you can use. Magento does not recommend particular software.
-
Create a connection to your Magento server.
Follow the prompts on your screen or consult the documentation provided with your FTP software for more information.
-
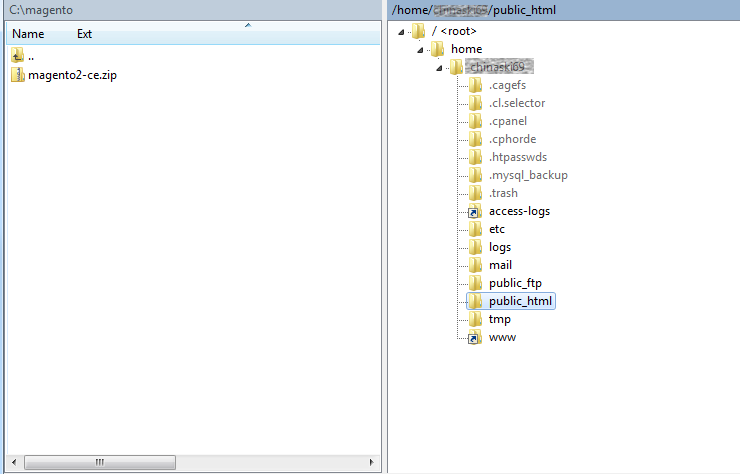
After you log in to your server, browse to locate the Magento CE or EE archive on your local system.
On the remote system, browse to locate the web server docroot directory.
The following figure shows an example.
-
Transfer the archive from your local system to the web server docroot directory.
On some FTP client software, you do this by dragging and dropping.
- Wait while the transfer completes.
- Log in to your Magento server, or switch to, the Magento file system owner.
- Change to the web server docroot or the virtual host directory.
-
Create a subdirectory for the Magento software.
If you set up a virtual host, the subdirectory name must match the name in your virtual host.
For example,
mkdir magento2ce
mkdir magento2ee
You can also use a generic directory name
mkdir magento2 -
Copy the Magento archive to that directory.
For example,
cp /var/www/Magento-CE-2.0.0-rc2+Samples.tar.bz2 magento2 - Continue with the next section.
Extract the software on your server
Log in to your Magento server as, or switch to, the Magento file system owner and extract the software package in the web server docroot using one of the following commands:
| File format | Command to extract |
|---|---|
| .tar.gz | tar zxf <filename> |
| .zip | unzip <filename> |
| .tar.bz2 | tar jxf <filename> |
The Magento software extracts to the directory you created. After the file has extracted, either delete the Magento archive or move it to another directory.
Set file system ownership and permissions
The following sections discuss how to set file system ownership and permissions:
Why we recommend you set file system permissions
Malicious exploits are an unfortunate reality in the internet age. To help prevent exploits that take advantage of the file system, we recommend you set Magento file system ownership and permissions in a particular way. For more information, see Overview of ownership and permissions.
This topic covers permissions for a development environment. In production, the web server user should have limited write privileges. To help manage you production and developer modes, we provide the magento deploy:mode:set command.
The important things:
- The owner of the Magento file system:
- Must have full control (read/write/execute) of all files and directories.
- Must not be the web server user; it should be a different user.
- The web server user must have write access to the following files and directories:
varapp/etcpub
In addition, the web server's group must own the Magento file system so that the Magento user (who is in the group) can share access to files with the web server user. (This includes files created by the Magento Admin or other web-based utilities.)
We recommend setting the permissions as follows:
- All directories have 770 permissions.
770 permissions give full control (that is, read/write/execute) to the owner and to the group and no permissions to anyone else. - All files have 660 permissions.
660 permissions mean the owner and the group can read and write but other users have no permissions.
File system permissions and ownership
Use the following steps:
- If you haven鈥檛 already done so, log in to your Magento server as, or switch to, the Magento file system owner.
-
Change to the Magento installation directory:
cd <web server docroot>/<magento2 base dir>The base directory is typically a subdirectory named
magento2under your web server鈥檚 docroot. Need help locating the docroot? Click here.Examples:
- Ubuntu:
/var/www/magento2 - CentOS:
/var/www/html/magento2
- Ubuntu:
-
Set ownership:
chown -R :<your web server group name> .Typical examples:
- CentOS:
chown -R :apache . - Ubuntu:
chown -R :www-data .
- CentOS:
-
Set permissions:
find . -type d -exec chmod 770 {} \; && find . -type f -exec chmod 660 {} \; && chmod u+x bin/magentoIf you must enter the commands as
sudo, use:sudo find . -type d -exec chmod 770 {} \; && sudo find . -type f -exec chmod 660 {} \; && sudo chmod u+x bin/magento
Next step
Install the Magento software:
Find us on