Contents
- Overview of securing cron
- Secure cron with Apache
- Secure cron with nginx
- Verify cron is secure
- Run cron from a web browser
Overview of securing cron
The Magento cron job runs a number of scheduled tasks, including reindexing, generating e-mails, generating newsletters, generating sitemaps, and so on. cron is a vital part of your Magento configuration.
You can run a Magento cron job in the following ways:
- Using the
magento cron:runcommand, either from the command line or in a crontab - Running
<your Magento install dir>/pub/cron.php?[group=<name>]in a web browser
This topic discusses securing pub/cron.php to prevent it from being used in a malicious exploit. If cron is unsecured, any user could potentially run cron to attack your Magento application.
You do not need to do anything if you use the magento cron:run command to run cron. This command uses a different process that is already secure.
The following sections discuss an example of securing cron using HTTP Basic authentication. You can optionally configure other types of authentication as well; we provide references for that information.
Secure cron with Apache
This section discusses how to secure cron using HTTP Basic authentication with Apache. For more options, consult one of the following resources:
- Apache 2.2 authentication and authorization tutorial
- Apache 2.4 authentication and authorization tutorial
The instructions that follow are based on Apache 2.2 with CentOS 6:
- Step 1: Create a password file
- Step 2: Optionally add users to create an authorized cron group
- Step 3: Secure cron in
.htaccess - Step 4: Verify cron is secure
Step 1: Create a password file
For security reasons, you can locate the password file anywhere except your web server docroot. In this example, we show how to store the password file in a new directory.
Enter the following commands as a user with root privileges:
mkdir -p /usr/local/apache/password
htpasswd -c /usr/local/apache/password/passwords <username>
where <username> can be the web server user or another user. In this example, we use the web server user but the choice of user is up to you.
Follow the prompts on your screen to create a password for the user.
To add another user to your password file, enter the following command as a user with root privileges:
htpasswd /usr/local/apache/password/passwords <username>
Step 2: Optionally add users to create an authorized cron group
You can optionally enable more than one user to run cron by adding these users to your password file and to a group file you鈥檒l configure in the next section.
To add another user to your password file, enter the following command as a user with root privileges:
htpasswd /usr/local/apache/password/passwords <username>
To create an authorized group, create a group file anywhere outside the web server docroot. The group file specifies the name of the group and the users in the group. In this example, the group name is MagentoCronGroup.
vim /usr/local/apache/password/group
Contents of the file:
MagentoCronGroup: <username1> ... <usernameN>
Step 3: Secure cron in .htaccess
To add security for cron in Magento鈥檚 .htaccess:
- Log in to your Magento server as, or switch to, the Magento file system owner.
-
Open
<your Magento install dir>/pub/.htaccessin a text editor.(Because
cron.phpis located in thepubdirectory, edit this.htaccessonly.) -
Cron access for one or more users. Replace the existing
<Files cron.php>directive with the following:<Files cron.php> AuthType Basic AuthName "Cron Authentication" AuthUserFile /usr/local/apache/password/passwords Require valid-user </Files> -
Cron access for a group. Replace the existing
<Files cron.php>directive with the following:<Files cron.php> AuthType Basic AuthName "Cron Authentication" AuthUserFile /usr/local/apache/password/passwords AuthGroupFile <path to optional group file> Require group <name> </Files> - Save your changes to
.htaccessand exit the text editor. -
Restart Apache:
CentOS:
service httpd restartUbuntu:
service apache2 restart - Continue with Verify cron is secure.
Secure cron with nginx
This section discusses how to secure cron using the nginx web server. You must perform the following tasks:
- Set up an encrypted password file for nginx
- Modify your nginx configuration to reference the password file when accessing
pub/cron.php
Step 1: Set up an encrypted password file for nginx
Consult a resource like the following:
- How To Set Up Password Authentication with Nginx on Ubuntu 14.04 (digitalocean)
- Basic HTTP Authentication With Nginx (howtoforge)
Step 2: Modify the nginx configuration
Add the following to your nginx.conf:
location cron\.php {
	auth_basic "Cron Authentication";
	auth_basic_user_file <path to password file>;
}
Restart nginx and continue with the next section.
Verify cron is secure
This section discusses how to verify that pub/cron.php is working by verifying that it鈥檚 creating rows in the cron_schedule database table. This section shows how to use SQL commands but you can also use a tool like phpmyadmin.
The default cron you're running in this example runs according to the schedule defined in crontab.xml. Some cron job runs only once a day. The first time you run cron from the browser, the cron_schedule table is updated but subsequent pub/cron.php requests run at the configured schedule.
To verify cron:
-
Log in to your Magento database as either the Magento database user or as
root.For example,
mysql -u magento -p -
Use the Magento database:
use <magento database name>;For example,
use magento; -
Delete all rows from the
cron_scheduledatabase table:TRUNCATE TABLE cron_schedule -
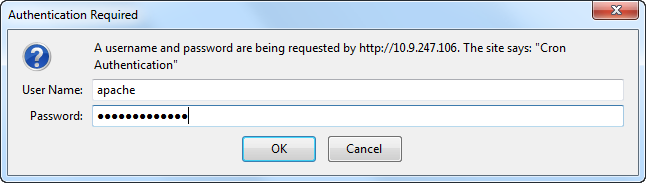
Run cron from a browser:
http[s]://<magento hose name or ip>/pub/cron.php?group=defaultFor example,
http://magento.example.com/pub/cron.php?group=defaultWhen prompted, enter an authorized user鈥檚 name and password. The following figure shows an example.
-
Verify rows were added to the table:
SELECT * from cron_scheduleVerify that some rows are returned. If so, you鈥檙e done!
Run cron from a web browser
You can run cron anytime using a web browser (for example, during development).
Do not run cron in a browser without securing it as discussed earlier in this topic.
Before you run cron in the browser, remove the restriction from .htaccess as follows:
- Log in to your Magento server as a user with permissions to write to the Magento file system.
-
Open any of the following in a text editor (depending on your entry point to Magento):
<your Magento install dir>/pub/.htaccess <your Magento install dir>/.htaccess -
Delete or comment out the following:
## Deny access to cron.php
<Files cron.php>
	order allow,deny
	deny from all
</Files>
For example,
## Deny access to cron.php #<Files cron.php> # order allow,deny # deny from all #</Files> - Save your changes and exit the text editor.
You can then run cron in a web browser as follows:
<your Magento host name or IP>/<Magento root>/pub/cron.php[?group=<group name>]
where
<your Magento host name or IP>is the host name or IP address of your Magento installation-
<Magento root>is the web server docroot-relative directory to which you installed the Magento softwareThe exact URL you use to run the Magento application depends on how you configured your web server and virtual host.
<group name>is any valid cron group name (optional)
For example,
http://magento.example.com/magento2/pub/cron.php?group=index
You must run cron twice: the first time to discover tasks to run and the second time to run the tasks themselves.
Find us on