What鈥檚 in this topic
This topic walks you through how to customize a template.
Prerequisites
Set your Magento application to the developer mode. The application mode influences the way static files are cached by Magento. The recommendations about theme development we provide in this chapter are developer/default-mode specific.
Template customization walkthrough
To customize a template:
-
Locate the template which is associated with the page/block you want to change using template hints.
-
Copy the template to your theme folder according to the template storing convention.
-
Make the required changes.
To add a new template in a theme:
-
Add a template in your theme directory according to the template storing convention.
-
Assign your template to a block in the corresponding layout file.
If you add a new .html template, and then edit it, the changes will not apply until you do the following: delete all files in the pub/static/frontend and var/view_preprocessing directories, then reload the pages. You can delete the files manually or run the grunt clean:<theme_name> command in CLI. For details about using Grunt in Magento see Installing and configuring Grunt.
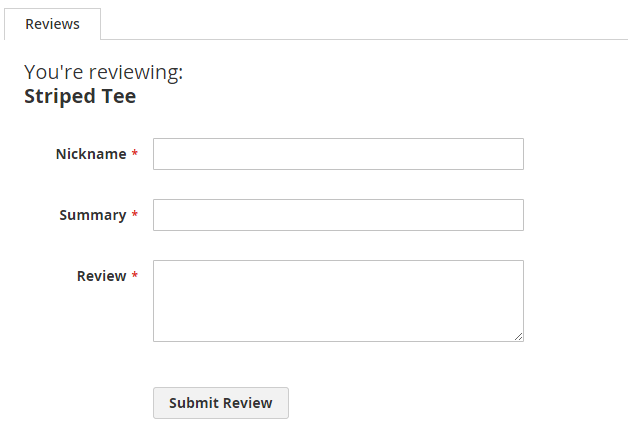
Walkthrough illustration: adding a message to the customer review form
A small customization to illustrate the walkthrough: in their Orange theme, the OrangeCo company wants to add a short text to the product review form to encourage customers to write reviews.
The following image illustrates how the default review form looks like:
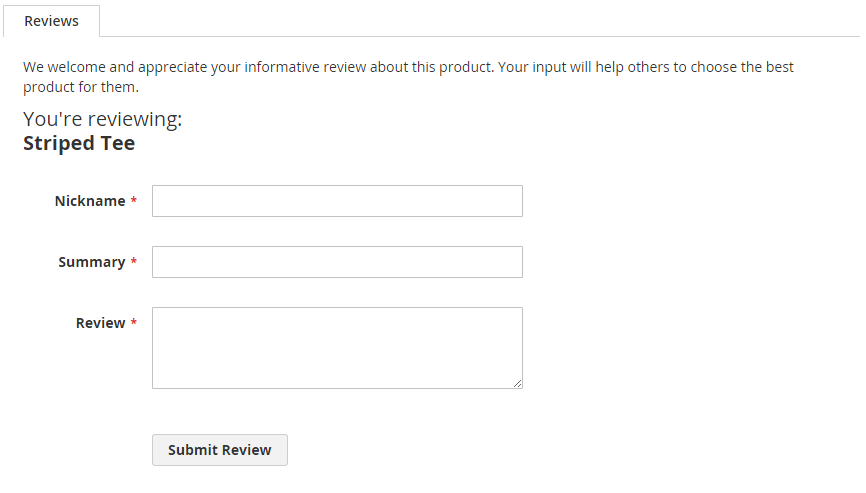
To add the text, OrangeCo needs to override the default review form template in the Orange theme.
First, they copy the form.phtml template from <Magento_Review_module_dir>/view/frontend/templates to the corresponding subdirectory in the Orange theme directory: app/design/frontend/OrangeCo/orange/Magento_Review/templates.
In the theme form.phtml file they add the HTML snippet with the message before the <form>:

Here鈥檚 how the form will look when the Orange theme is applied in a store:
Find us on